Unity, in the gaming world today, holds its own as a premier game engine. Now, it might not flex its muscles quite like Unreal Engine, but it’s the trusty sidekick for thousands of game developers, just like you. So, keep reading to understand the basics like how to animate 2D characters in Unity.
Think about some of the epic games we all love – Among Us, Genshin Impact, Pokemon Go and Monument Valley. These games go from multiplayer to AR integrated platforms. In all they show us what gaming can truly be on Unity. The question is, what is it that makes these games so impactful. While the functionalities and storylines are cool, there’s another hidden factor.
Let’s get real here: characters are the heart and soul of any game, right? And what makes them truly pop and bring a smile to your face? Well, it’s good character animation! It’s what takes a game from “meh” to “mind-blowing.”
So, you might be wondering, how do you animate a character in Unity? Let’s break it down, plain and simple.
INTRODUCTION TO 2D CHARACTER ANIMATION IN UNITY
Animating in Unity is actually easier than you might think! Let’s break down some of the terminologies used in Unity in a simple way.
Animation Clips: These are the building blocks of Unity 2D animations. Think of them as little animation files you can either create in Unity or import from elsewhere. These clips are like puzzle pieces that you put together to make a complete animation. Once you’ve got your animation clips ready, it’s time to move on to the next step.
Animation Controllers: Animation controllers take your animation clips and give them commands. Basically, they help you control what your character does. So, for example, you can make your character crouch and stand up every time you press ‘X’ on your 2D character controller. Unity even helps you out by creating animator controllers for you when you start adding animation info and using state machines.
State Machines: Don’t let the fancy name intimidate you! State machines are just a way to manage all the different actions your characters can do. Think of it like a flowchart that shows what your character can do from any given state. For instance, if your character is idle, they can’t do a running jump, but they can do a regular jump. State machines keep everything organised and are super important for Unity animation.
So, in a nutshell, Unity animation is all about using animation clips, animation controllers, and state machines to make your characters move and do cool stuff. It’s easier than it sounds!

PREPARING AND IMPORTING YOUR 2D CHARACTER FOR ANIMATION
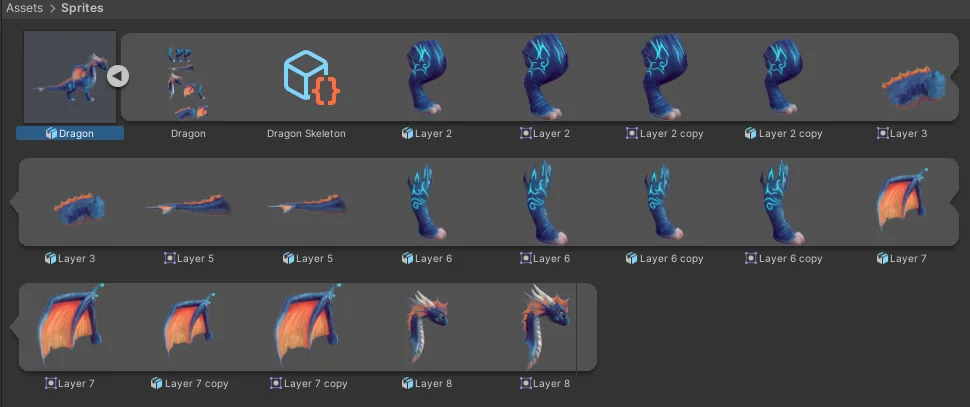
To get your artwork ready for animation in Unity, you can use two packages: the 2D Animation package and the PSD Importer package.
The PSD Importer package is like a magic tool that takes the different parts of your artwork from Photoshop and turns them into Sprites. Sprites are like the building blocks of your animations.
But there’s a catch! The PSD Importer only works with a specific Photoshop file format called .psb. So, when you create your artwork, it’s best to use Adobe Photoshop or another software that can save in the .psb format.
When you’re setting up your character or object for animation, it’s a good idea to start with them in a basic position, like standing idle. Also, if your animation is a bit complicated, it’s smart to put each part of your artwork on separate layers in Photoshop. This makes it easier to work with.
Remember, the artwork file must be saved in that special .psb format, which is kind of like .psd but can handle much bigger images. To change your artwork from .psd to .psb, just open it in Adobe Photoshop and save it as a .psb file.
So, in simple terms, use these two packages in Unity to bring your artwork to life for animation. Just make sure your artwork is in the right format and organised in Photoshop, and you’re good to go!
RIG YOUR 2D CHARACTER WITH UNITY’S SKINNING EDITOR
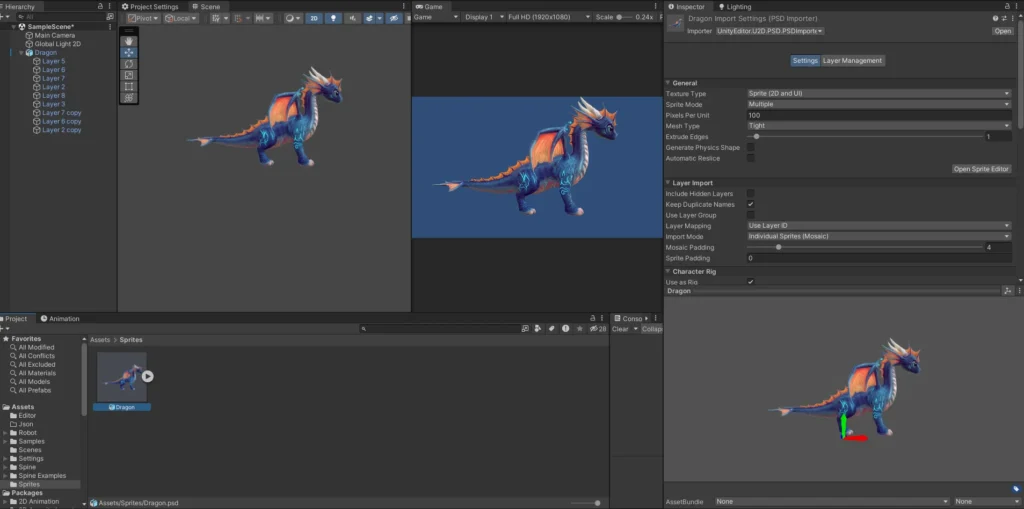
When you install the 2D Animation package in Unity, you’ll find a handy tool called the Skinning Editor inside the Sprite Editor. This tool is your best friend when it comes to creating bones for your character’s skeleton, adjusting its shape, and connecting those bones to the character’s body for animation.
OPENING THE SKINNING EDITOR:
Here’s how to start using it:
- First, find the actor Prefab that’s automatically created when you import your artwork into your Unity Project.
- Then, open the Inspector window for this actor Prefab.
- In the Inspector window, you’ll see a button called “Sprite Editor.” Click on it to open your actor’s artwork in the Sprite Editor.
- Once you’re in the Sprite Editor, look for a drop-down menu in the upper left corner. Click on it, and you’ll find the “Skinning Editor” option. Select that to enter the Skinning Editor.
SELECTING BONES AND MESH VERTICES:
Now, when you’re using the Bone and Geometry tools in the Skinning Editor, you might need to select specific bones or parts of your character’s mesh. Here’s how to do it:
- To pick a bone or a single mesh vertex, simply click on it.
- If you want to select multiple bones or vertices at once, you can draw a rectangle around them.
- And if you need to deselect any bone or mesh vertices you’ve already picked, just right-click on them.
ANIMATING 2D CHARACTERS IN UNITY
Once you’ve imported and rigged your character, you can jump right into animation. It’s as simple as dragging your rigged character into the Scene view. Then, on the Animation timeline in Unity, you can move the different bones of your character to create animations. The character’s mesh will follow the positions of these rigged bones, resulting in smooth and lifelike animations.
But wait, there are more ways to animate using the 2D Animation package! Here are a couple of examples:
- Sprite Swap: With this feature, you can swap out different sprites in real-time during your game. You can switch just one part of your character or even replace the whole Sprite Library Asset it’s connected to. This is handy for changing appearances or animations on the fly.
- Sample Projects: The 2D Animation package also comes with sample projects that you can import. These projects demonstrate various animation techniques using the package’s features, like Animated Swap. If you want to explore different ways to animate, check out the sample projects and their documentation for more details.
So, whether you’re dragging and positioning bones in the Scene view or trying out advanced techniques like Sprite Swap, the 2D Animation package offers you plenty of options to bring your characters to life in Unity.
2D INVERSE KINEMATICS (IK)
2D Inverse Kinematics (IK) is a nifty tool in Unity that helps you move your character’s limbs smoothly. It figures out how to position and rotate the bones in your 2D character’s skeleton so they reach a target spot. This makes it a breeze to make your character move realistically or play around with its skeleton in real-time.
YOU ARE ALL SET TO ANIMATE 2D CHARACTERS IN UNITY
In conclusion, if you’re looking to take your game or 2D animation to the next level, Unity’s 2D Animation package features are game-changers (pun-intended). They make it easy to bring your 2D characters to life and create smooth animations
Don’t miss out on the chance to create stunning animations and games that will captivate your audience. And remember, in case you find yourself needing a little help, our 2D animation company is here to help animate your 2D character.


